

There are some simple tips to keep in mind when transplanting greenery to a new home.
July 16, 2020
Gardens
In the garden: How to repot plants
From the moment you take responsibility for a seedling or plant, there are a few rules to follow if you want to give your new specimen the best chance of survival. Once you have purchased new plants from a local garden centre, you’ll soon be ready to plant. However, if these rules are not followed, your plant may have a short life ahead of it.
Firstly, don’t leave them in the car too long or they may dry out. A sunny day could take much of the moisture from the plant and its potting mix, which would stress it badly.
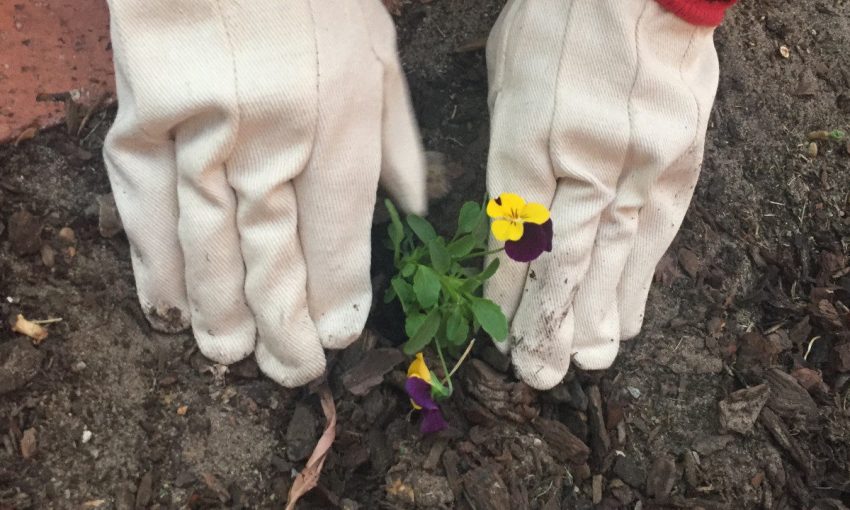
Care is required for seedlings especially. Whether they are flower, vegetable or herb seedlings, the most important start for them is getting them out of the punnet or container without them losing all the potting mix from their roots. Often they will be tight in the cells of the punnet, so squeeze the cell on all sides to loosen any grip the mix or roots have on the plastic sides.

Do not try and pull any seedling out by its shoots as it may break from the roots and that will be the end of that plant. Once you have squeezed a cell and feel that it is likely to come out easily, tip the punnet up slowly and grab the base of the seedling and help it slide easily out, cupping your hand around the root and mix to stop it from falling apart.
In the meantime, you would have made the hole in your garden bed soil or potting mix ready to place the seedling in. If there are many roots on the seedling, they can be teased out a little to help them get a good start. Once the seedling is in the hole, fill in around it and make sure it is well packed. After watering the seedlings you are likely to need to firm up the soil around the seedling again.
Plant each seedling one at a time, so the roots spend minimal time exposed to the air. If they are going into a pot, make sure you have premium potting mix. Give the seedlings a light watering with a soluble fertiliser and seaweed solution and they will get growing straight away.
An important tip if it is a hot day, is to leave the job until the cool of the later afternoon or early evening. That way the seedlings will have overnight to get settled in.
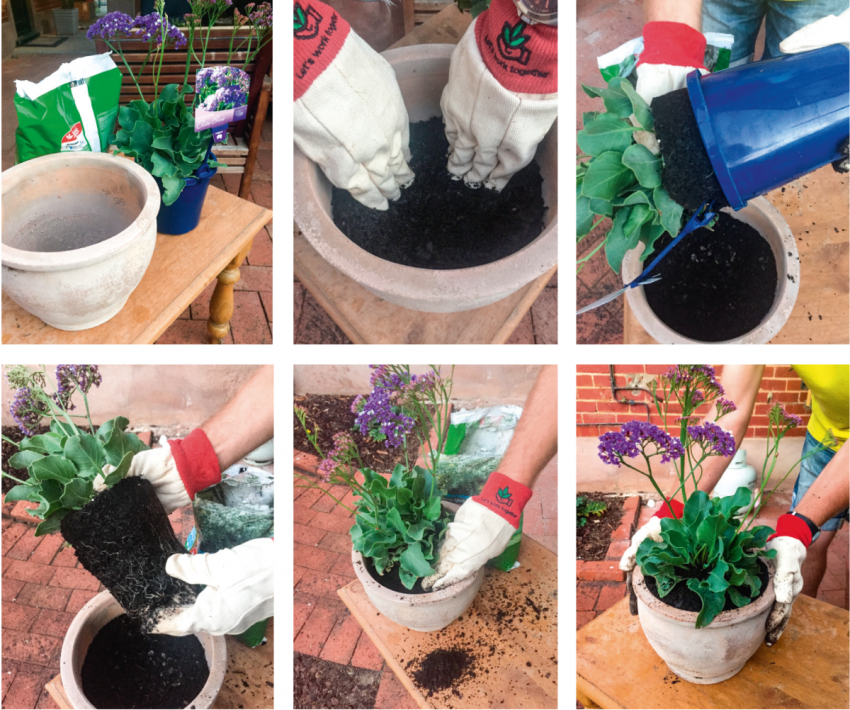
For a mature plant, taking it from the plastic pot is again a critical stage for its new life. It is most likely that the new plants you have bought have come in a plain plastic pot and you will want to put them into a different pot or garden bed.
To remove it safely, put your hand over the top of the pot and while holding the plant’s stem turn the pot upside down. It should come out easily, but if the root ball is tight, tap the bottom of it and slowly pull the pot away from the plant.
Once the plant is out of the pot, the roots might be tightly bound around the potting mix. If so, don’t be afraid to break them up and pull them loose. You may need to loosen the roots and the soil so any concave shape created by the plastic pot around the base of the plant is removed. You don’t want an air pocket underneath the plant when it goes into the new pot or ground, this is important.
Always plant into a pot that is bigger than the pot it came in. This will allow its roots to grow and fill the space in its new home. Pack potting mix in around the plant, press it down to make sure it’s firm, water it and then press it down again. Water in with a seaweed solution and this will help root growth, ensuring a quick recovery from transplanting. Your new plant in a pot is off and running, so to speak.
If you are planting into a garden bed, hopefully your soil is well-prepared with a good organic fertiliser. The general rule if planting out a flowering plant, shrub or tree is to make a hole that is twice the diameter of the root ball, and also a little deeper. After taking the plant out of the pot using the method already described, place in the centre of the hole and backfill with soil or potting mix.
A slow-release fertiliser suited to the type of plant could also be mixed in with the soil being packed in around the plant to help it grow in the months ahead. Follow these simple rules and your new plants will be off to a good start.
This story first appeared in the Winter 2019 issue of SALIFE Gardens & Outdoor Living magazine.
Subscribe Today!
Subscribe to South Australia's biggest-selling magazine, showcasing the best of Adelaide and South Australia. $143 per year with free delivery to your door.
Share —